Replacement Parts
Introduction
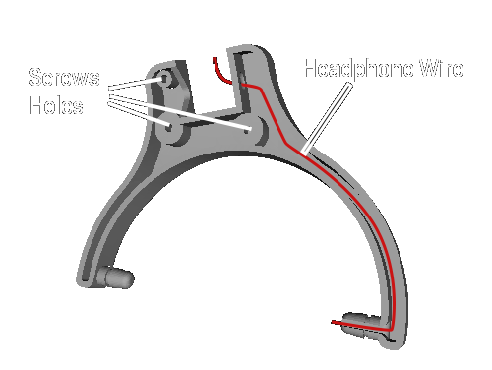
The Audio-Technica ATH-M40x’s are pretty good headphones. I’ve had mine for years, and it has survived many drops and cord yanks. The one downside is that the armature (the part that attaches the earcups to the headband), is prone to breaking.
Here’s a link to the repo (Latest version: Jan 14, 2026). This contains all of the individual parts, the fully assembled model for show, and some .3mf files to skip the hassle of setting up the individual parts for printing. It’s been updated to have both left and right ears, have the parts fit together better, and be stronger overall.
- The fully assembled model is for demonstration purposes and should not be 3D printed. Instead, use the .3mf files (or the individual files).
- Please see the warning below on printing the Pivot.
Recommendations and Purposes
Recommendations
- Use the .3mf files to print as it’s easier and you can always delete what you don’t need. But if you’re so inclined, you can use the individual STL files.
- Not so much a recommendation, but you’ll need a soldering iron to solder/desolder the audio wires. Remember which one is the left/right channel and ground (or just take a picture).
If you choose to print the individual parts
- I recommend printing the pivot with with at least an 80% infill. The other parts don’t need the strength as much, but if you want them to last longer, you should print them with at least an 80% infill as well.
- The pivot should have support blockers for the holes that intersect. Otherwise you’ll have bits of plastic that block the wire from passing through and you won’t be able to get the plastic out.
- The Band Assembly should have the groove side facing up when printing, otherwise the pivot will cause friction when you assemble the parts together.
Purposes
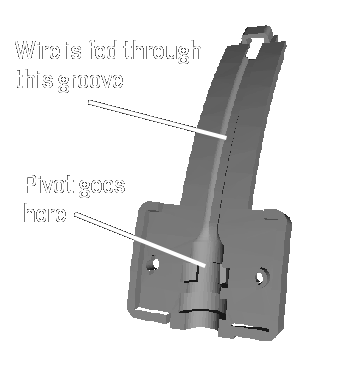
Part 1A - Band Assembly
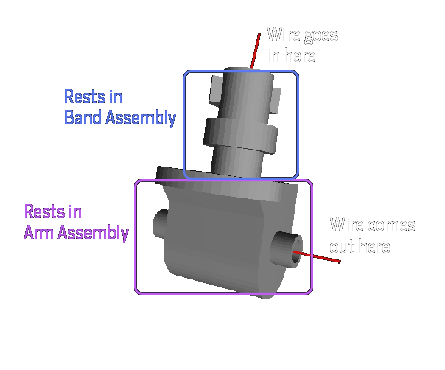
The Band Assembly attaches to the headband and pivot. It routes the wire from the headband to the pivot.
Part 1B - Band Assembly Cover
This places a cover on the band assembly. It holds the pivot in place.
Part 2 - Pivot
The Pivot allows the headphones to twist and bend. The flat side faces the outside.
The orientation in which the pivot is 3D printed is critical! An incorrect orientation can weaken the part, causing it to snap prematurely.
I also recommend printing the pivot with with at least an 80% infill.

The red lines represent how the plastic would be layered in a vertical print.
The arrow shows a shearing force at the point where the part is the weakest. The force is caused by taking off, putting on, or just simply wearing the headphones.
Due to the print orientation, only a thin layer of plastic separates the top part and the bottom part. Essentially, the force is applied in the same direction as the “grain”, causing it to snap easily.
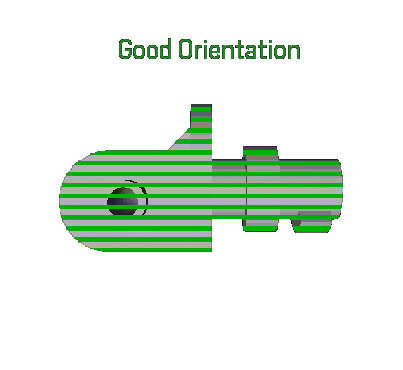
The green lines represent how the plastic would be layered in a horizontal print.
We solve the previous problem by printing the pivot horizontally. Instead of a thin layer of plastic holding the top and bottom part together, we have multiple layers of plastic. The force is now applied perpendicular to the “grain”, making it resist the force better.
Part 3A - Arm Assembly
The Arm Assembly attaches directly to the earcups, and routes the headphone wire directly to the headphone driver. It also attaches to the pivot.
Part 3B - Arm Assembly Cover
The Arm Assembly Cover is just a cover that can be screwed onto the Arm Assembly. It holds the wire and pivot in place.
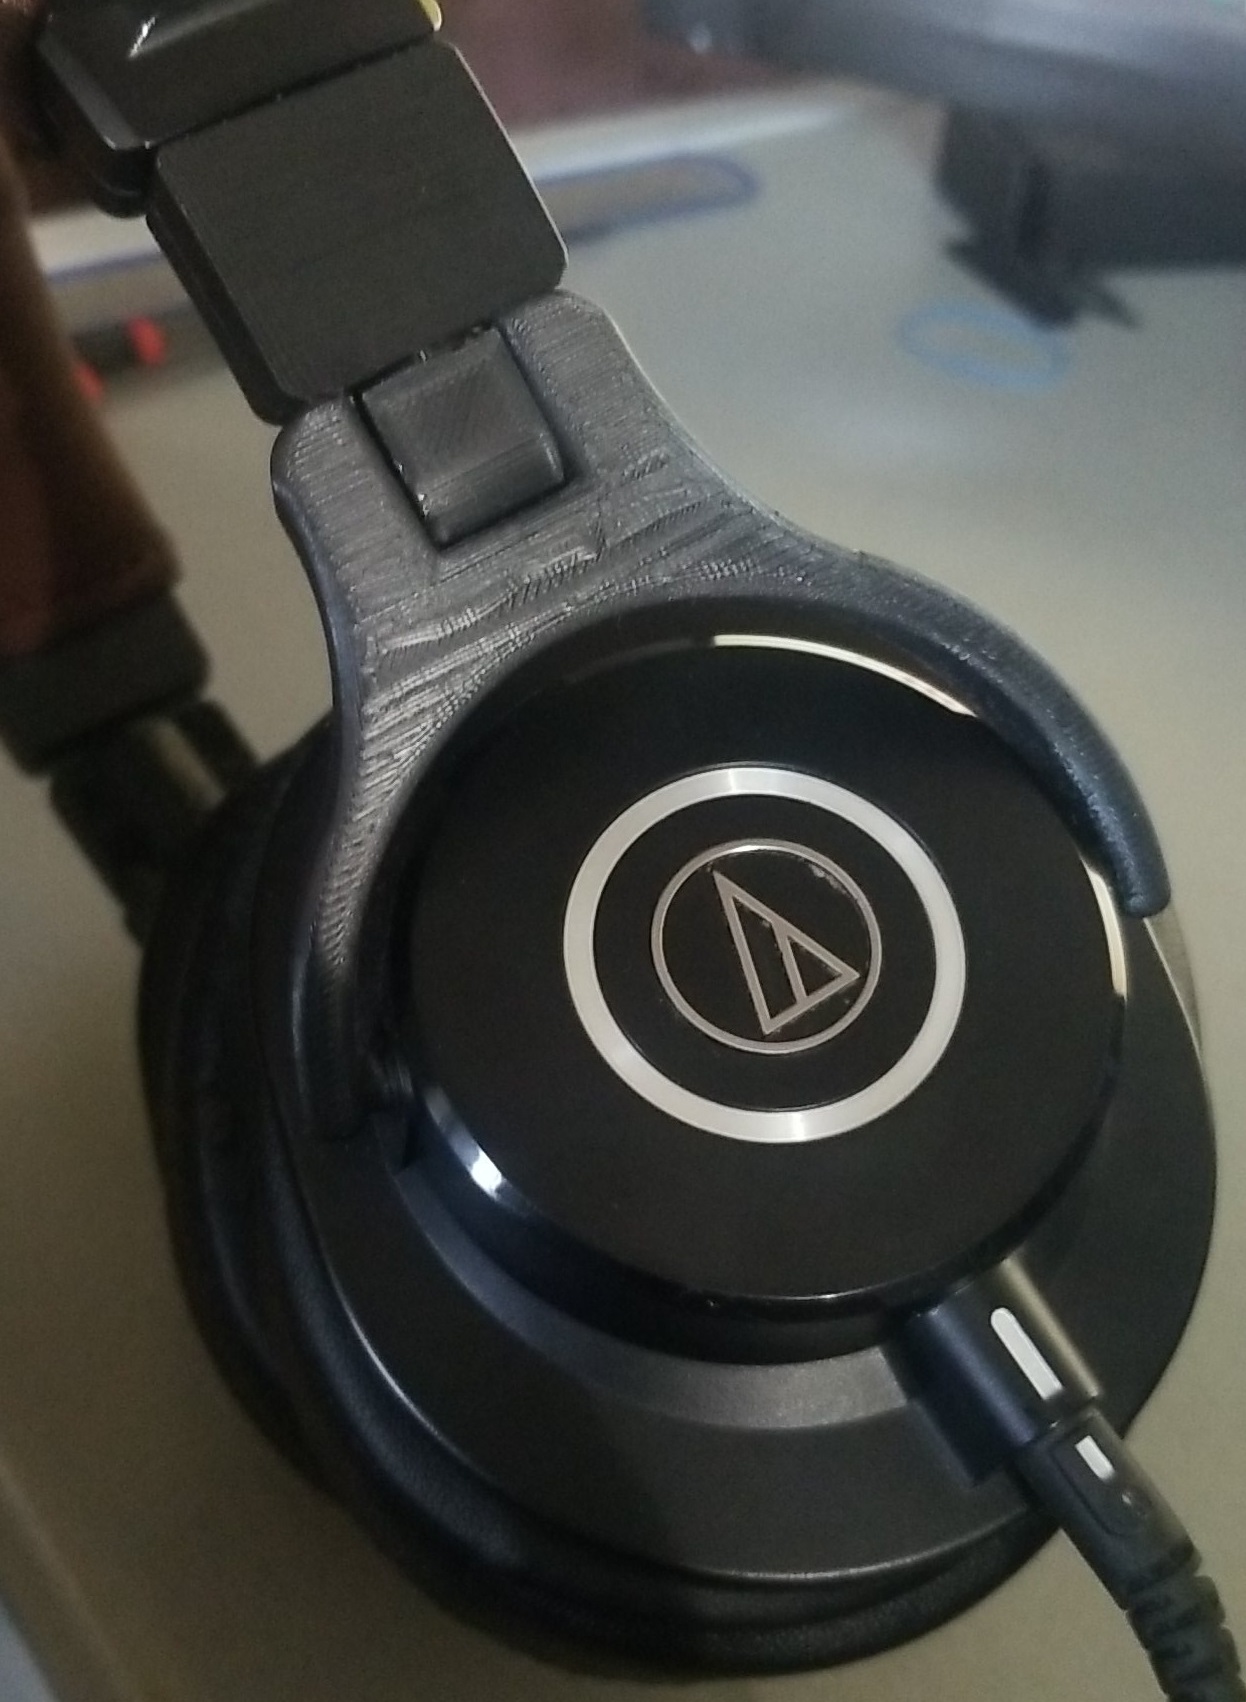
The Final Product
Here’s the headphone assembly, fully printed and on my headphones!