Introduction
The Audio-Technica ATH-M40x’s are pretty good headphones. I’ve had mine for years, and it has survived many drops and cord yanks. The one downside is that the armature (the part that attaches the earcups to the headband), is prone to breaking.
I designed replacement parts for the headphones, while trying to maintain the original look. Here is a fully assembled model of the replacement parts.
- The models are for the right ear. Mirror the models to get the left ear
- The complete and assembled model is for demonstration purposes and should not be 3D printed. Instead, 3D print the individual parts, which are available below. Alternatively, you can visit the repo here
- Please see the warning below on printing the Pivot
Models and Purposes
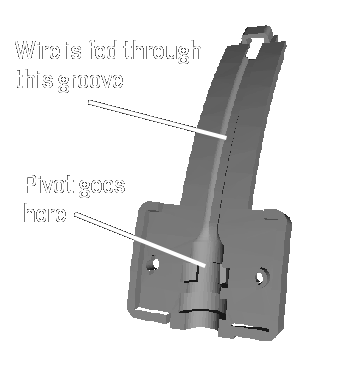
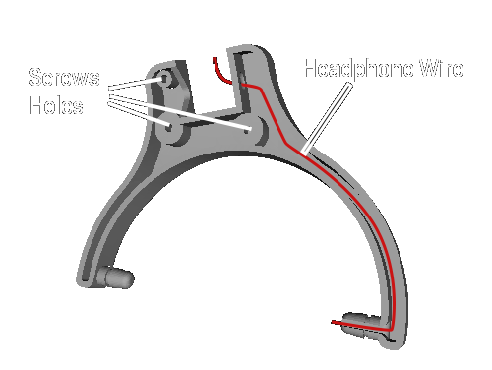
Part 1A - Band Assembly
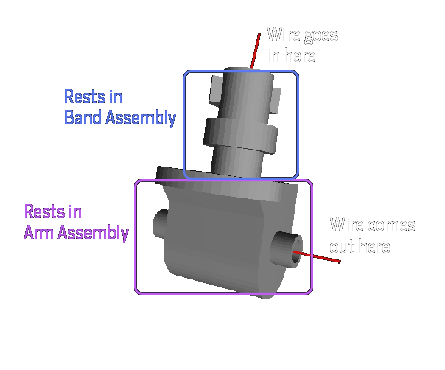
The Band Assembly attaches to the headband and pivot. It routes the wire from the headband to the pivot. View Band Assembly on Github
Part 1B - Band Assembly Cover
The Pivot allows the headphones to twist and bend. View Pivot on Github
Part 2 - Pivot
The Pivot allows the headphones to twist and bend. View Pivot on Github
The orientation in which the pivot is 3D printed is critical! An incorrect orientation can weaken the part, causing it to snap prematurely.

The red lines represent how the plastic would be layered in a vertical print.
The arrow shows a shearing force at the point where the part is the weakest. The force is caused by taking off, putting on, or just simply wearing the headphones.
Due to the print orientation, only a thin layer of plastic separates the top part and the bottom part. Essentially, the force is applied in the same direction as the “grain”, causing it to snap easily.
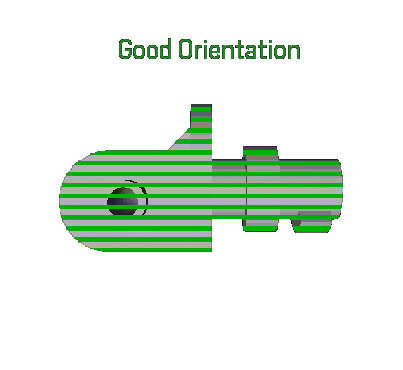
The green lines represent how the plastic would be layered in a horizontal print.
We solve the previous problem by printing the pivot horizontally. Instead of a thin layer of plastic holding the top and bottom part together, we have multiple layers of plastic. The force is now applied perpendicular to the “grain”, making it resist the force better.
Part 3A - Arm Assembly
The Arm Assembly attaches directly to the earcups, and routes the headphone wire directly to the headphone driver. It also attaches to the pivot. View Arm Assembly on Github
Part 3B - Arm Assembly Cover
The Arm Assembly Cover is just a cover that can be screwed onto the Arm Assembly. It holds the wire and pivot in place. View Arm Assembly Cover on Github
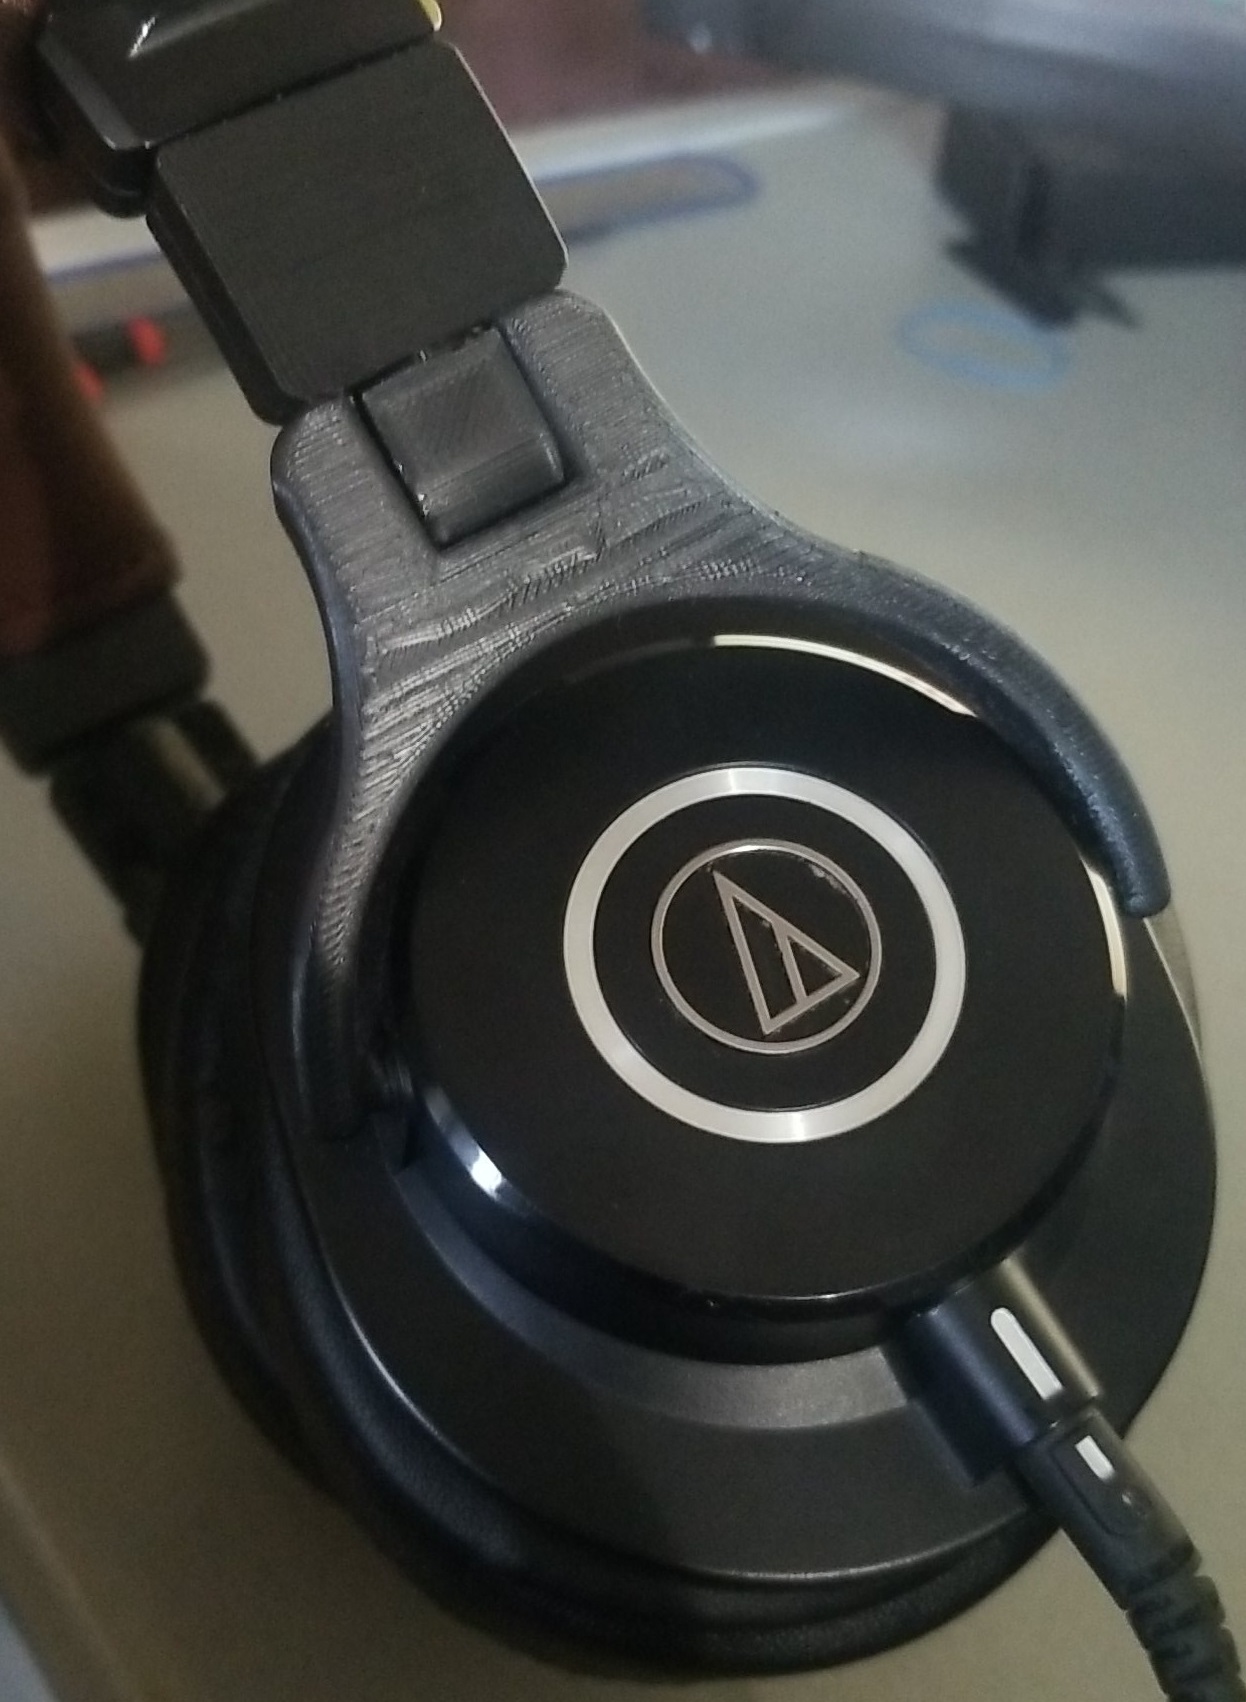
The Final Product
Here’s the headphone assembly, fully printed and on my headphones!